


Applying Essential Oils for Your Feet: Plus the Best Options
 Applying Essential Oils for Your Feet: Plus the Best Options www.walkjogrun.net
 Essential oils were originally referred to as “quintessential oils” stemming from the Aristotelian belief that all matter is composed of either fire, water, earth or air. The human spirit (or life force) was deemed the fifth element, namely the quintessence. By using the processes of distillation and evaporation, it was thought that the spirit of a particular plant was removed. This is how the term “spirits” came to represent certain alcoholic beverages such as whiskey, brandy, and gin.
As we fast forward to present day thinking and take a look at essential oils from a scientific perspective, we now realize that they are a mix of complex chemicals that are physical in nature. The ISO (International Organization for Standardization) defines an essential oil as a product resulting from:
- Steam or water distillation
- The mechanical procedure which processes citrus rinds
- Dry distillation of natural materials.
The result of any one of these distilling methods then produces the desired essential oil which has been physically separated from the water. What makes an essential oil authentic is undergoing isolation by physical means exclusively. A more in-depth explanation of how essential oils for feet can help us care for and treat conditons and ailments, as well as how the plants themselves are harvested have been researched and available so, get comfy and get ready to indulge yourself in a very informative, pleasurable and aromatic journey.
Using Essential Oils for Feet
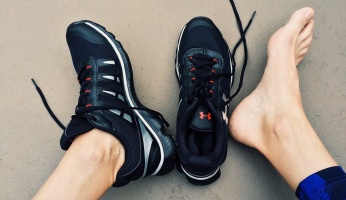
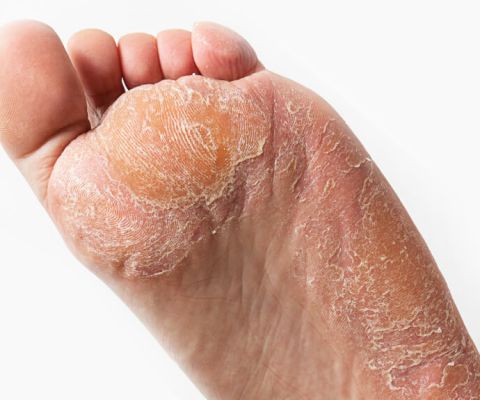
In the United States, 85% of the people who live and work in this country have foot conditions that require medical attention. As everybody’s problems may be different in nature and extent, they do share their negative impact on the human body by affecting the knees, hips and lower back. Most of the pain associated with foot ailments is caused by wearing shoes that don’t fit correctly along with years of wear and tear. Other causes of foot pain are attributed to medical conditions such as bunions, corns, calluses, neuromas and hammertoes, to name a few. Treating yourself to a few minutes of massage while applying a few drops of an essential oil will improve circulation and give you relief from sore, tired, cracked, dry and very worn out feet. In addition to using essential oil for massage, you may also be inclined to learn about using essential oils in a foot bath, foot scrub, foot lotion and foot powder. Before we delve into the actual application of essential oil, let’s take a look at the most commonly used types and the benefits they offer:

- Purely Northwest Foot Soak
-
Our rating - Eliminates Odor
- Price: See Here

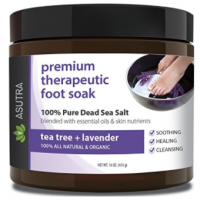
- Asutra Foot Soak
-
Our rating - Healing Minerals
- Price: See Here
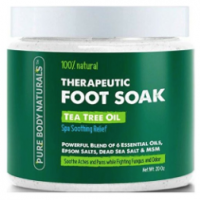

- Pure Body Naturals Foot Soak
-
Our rating - Antioxidant
- Price: See Here
Step #1: A Few of the Most Commonly Used Essential Oils for Feet
- Peppermint is applied for its ability to soothe tired feet and decrease inflammation
- Lavender is recommended for relaxation and its soothing properties
- Rosemary is recommended and applied when someone is suffering from aches and pain associated with rheumatoid symptoms and is also known to be a stimulant
- Lemon has a stimulating effect due to its citrus properties.
- Eucalyptus is recommended when antiseptic and/or antiviral properties are called for
Step #2: Mixing Up an Essential Oil Foot Bath
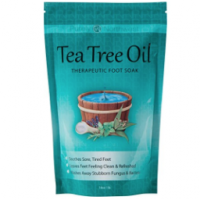
- For an invigorating experience and an excellent antifungal foot bath (when you don’t have antifungal soap), fill a basin with warm water and add 5 drops of tea tree oil, 2 drops of peppermint oil and 5 drops rosemary oil. Soak your feet for 15 minutes.
- Note: Replace the water with sage tea or for a more powerful fungus fighting mixture
- Tea tree oil is also recommended for fungus infections and relief from blisters, infected wounds, athlete’s foot, insect bites, warts, and rashes.
- Adding essential oils to your Epsom salt foot bath is a great way to treat dry or cracked skin on the feet. Oils such as peppermint, lavender, rosemary, geranium or sweet orange will all help in keeping the skin soft. Follow up with an application of non-greasy moisturizer.
- Try the following recipe for your next essential oil foot bath:
- Fill your foot spa with warm water up to your ankles. Add 2 tablespoons sea salt, 2 drops rosemary and 1 drop peppermint-soak for 20 minutes.
- Note: Either ginger or cypress oil can be used as a substitute for peppermint oil.
- When you’re concerned about foot fungus, athlete’s foot, mycotic toenails, tinea (a species of ringworm), or hyperhidrosis disorder of the foot (excessive sweating), choose from amongst those essential oils that have an antimicrobial quality to them: sage, peppermint, clove, geranium, tea tree, myrrh, thyme, and lemon.
- Fill your foot spa with warm water up to your ankles. Add 2 tablespoons sea salt, 2 drops rosemary and 1 drop peppermint-soak for 20 minutes.
Step #3: Simple Satisfying Foot Soaks and Spa Recipes
When sore and tired feet become the focal point of your day, try to remember it doesn’t have to be this way. A simple and incredibly effective remedy lies in your foot spa. Additional benefits may be obtained for people suffering from cold or flu by just leaning over your spa and inhaling the vapors as they’re wafting upward from the tub.
- Filla tub with warm water and add ¼ cup of sea salt. Add marbles so the base of the spa is covered along with 5-10 drops of one of these essential oils: camphor, lavender, lemon, juniper, rosemary, eucalyptus or peppermint. Start rolling the bottom of your feet over the marbles and try to pick them up with your toes. This little exercise will isolate very small and hard to reach foot muscles resulting in extra blood flow. Even a small improvement in circulation will send oxygen to your achy feet relieving much of the pain from standing and working all day.
Step #4: When There is Associated Pain in the Legs
When you’re experiencing both foot and leg pain at the same time, instead of using a foot spa-draw a regular bath and prepare this recipe for relieving tired and cramped legs:
- 4 tablespoons Epsom salt or sea salt
- 2 tablespoons soy oil
- 8 drops peppermint essential oil
Step #5: Foot Scrub Recipe for Dry and Itchy Feet
Get some relief from dry and itching skin by making a paste with the following ingredients and adding warm water:
- Grind together oatmeal and cornmeal to equal ¼ cup
- Add one tablespoon Epsom, sea or table salt
- 4-6 drops of lemon (or peppermint if your skin is sensitive) essential oil
- Once your mixture is ready, massage it into every area of your foot including the spaces in between the toes.
- Rinse when finished, pat dry and apply moisturizer.
Step #6: Including Essential Oils in Your Body Lotions
Try this invigorating lotion in place of, or, following your foot soak:
- Mix together 1 tablespoon almond oil
- 1 tablespoon olive oil
- 1 tablespoon wheat germ oil
- 12 drops eucalyptus oil
- Massage into your heels and feet (and hands when finished).
Recipe for Dry Skin, Foot Calluses, and Muscle Aches
- 5 ounces of either peppermint or spearmint essential oil combined with 20 ounces of beeswax. Mix well and massage into both feet.
Step #7: Powerful Moisture Prevention with Foot Powders
This recipe was developed for people who sweat excessively inside their shoes. It should keep moisture to a minimum with the addition of 2 tablespoons arrowroot powder to 2 drops tea tree oil and 2 drops rosemary oil. Consider adding geranium or clove to the arrowroot powder for a variety of aromatic powders.
Recommendations:
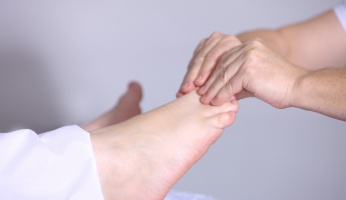
Always make sure you are not allergic or extra sensitive to certain essential oils. Applying a small amount to your skin should reveal any redness or itching within the first few moments after application. Remember to keep any and all essential oils, powders and lotions out of the reach of children. In order to obtain maximum benefits from your foot treatments, use massage techniques that are most effective for your condition: try circular motions with a little pressure on the specific areas of pain or discomfort. And be sure not to miss your toe areas-all four sides of the toes will benefit from essential oil massage therapy.
You can easily find the above-mentioned ingredients online so here’s a shopping list to help you get started:
- Organic Essential Oils
- Organic Arrowroot Powder
- Epsom Salt
- Organic Soy Oil, Olive Oil, Wheatgerm Oil, Almond Oil
- Unscented Moisturizing Lotion
Exploring Various Methods of Essential Oil Extraction
Methods and Procedures Used in Professional and at Home Distilling
After reading all about homemade lotions and potions containing essential oils, perhaps you find yourself interested in learning how to go about harvesting your own oils. The following information is included just for you.
There are mainly two methods for extraction of essential oils: Expression, also known as cold pressing, is an extraction method specific to citrus essential oils such as lemon, tangerine, sweet orange, Bergamot, and lime. Back in the day, expression was performed by hand; paying close attention to the following steps:
Step #1: Processing the Rind
- Sponge pressing, is the process of soaking the rind or zest of a citrus fruit in warm water. The rind is then pressed with a sponge which breaks down the cavities containing the essential oils absorbing them at the same time. When the sponge is filled with the extracted oil, it is pressed and collected in a vessel or container where it separates. Once separated the essential oil is siphoned off.
- Modern-day rind processing is much faster and less laborious namely the Écuelle à piquer process where a prodding, sticking and pricking action is performed, thereby releasing the essential oil. A container with sharp spikes on the inside is used to hold the rind and then rotated. Once the essential oil is released, it is collected in a receptacle and allowed to stand while separation takes place, and then promptly siphoned off to complete the process. Modern expression equipment incorporates the use of centrifugal force which eliminates the waiting time for separation; accomplishing the task
in seconds at high speed.
Step #2: The History of Distillation
The process of distilling liquids has been around for centuries based on the discovery of an earthenware vessel designed for extracting aromatic oils using steam over 5000 years ago.
A crude form of distillation was implemented during the Middle Ages for preparing floral scented water, making perfume, digestive aids, food enhancement, and barter.
As early as 900 A.D., a child prodigy by the name of Avicenna obtained accreditation for his documentation on plants and massage as well as his improvement of the cooling method in the distillation process.
Step #3: The Process of Distilling
A still is a single pot or chamber usually made out of copper or stainless steel used to distill essential oils and various other liquid mixtures. Simple distillation of essential oils includes:
- Placing the plant material on a grid located inside the still.
- Once the still is sealed, steam is generated by lighting a fire beneath the still.
- The steam that is produced by heating the water will penetrate the plant releasing the volatile constituents.
- These elements then rise up and are guided to a condenser.
- The purpose of the condenser is to cool the vapor returning it to liquid form.
- This liquid is collected via the receptacle below the condenser where separation may take place.
- Most essential oils rise to the surface and are siphoned off but some, such as clove oil, is heavier than water and will go to the bottom.
Recommendations:
Everything about essential oils is great and enticing. The way they feel and smell is a sensual treat from the time you open the bottle. Then comes the application, turning your aromatherapy into a physical experience which may help relieve many ailments and health problems. Perhaps you’re one of those people who loves learning and would be interested in distilling your own essential oils. Folks have been doing this for many thousands of years, have a look and see if this is something you’d like to do at home.
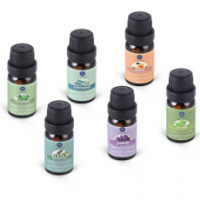
- Lagunamoon Aromatherapy
-
Our rating - No Added Fillers
- Price: See Here
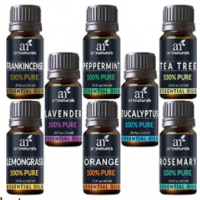
- ArtNaturals Aromatherapy
-
Our rating - Paraben Free
- Price: See Here

- Radha Beauty Aromatherapy
-
Our rating - Therapeutic Grade
- Price: See Here
The Art of Distilling Essential Oils at Home
Parts and Procedures for Producing Extraordinary Products
The highly coveted oils extracted from plants can be produced in the comfort of your own home, making the cost much lower than if you order them online or in stores. Concentrated oils may be obtained using the following steps:
Step#1: Drilling for Essential Oils
The number one item on the top of your list is the still. You can find complete distillation kits online that use either air or water. Type “essential oil still” in your search engine or go to your favorite online store and type it in there. Consider the quantity you’re interested in making, how you’re going to store it, and any labels you want to use.
Building your own still is also an option if you’re the creative type. There are many designs to choose from, or, you can create your own-as long as these key components are implemented in your design:
- The heat source, usually direct flame
- The pressure cooker
- A glass tube, 10 mm long
- A condenser (usually a tub of ice-cold water designed to cool down the steam flowing through the still’s pipe).
- The essencier essential oil separator for eliminating contaminants.
When possible, always use stainless steel and glass parts. Never use plastic or rubber tubing in place of glass-it will affect the overall quality of your oil. A few plants may react negatively to copper so, heavily tinned copper is recommended in all cases. Aluminum materials are also acceptable, however, plants containing phenols such as wintergreen, and clove are not recommended.
- You’ll need to bend your pipe so the steam that passes through it can be cooled down in the tub of ice water. Depending on the size of your basin, you can choose a coil shape or a simple 90-degree angle. This is a good time to look at diagrams you can find online.
- Connect your pressure cooker valve to the pipe by using a small section of a flexible hose that will snugly fit over each end. A jubilee clip is perfect for securing the connecting points. Allow some bending room when you’re measuring the length of the hose.
- When using an open basin, position your pipe so the coil is completely submerged after filled with water. If a bucket is used, make a small hole in the bottom large enough so the pipe passes through it and out of the ice bath. Epoxy or silicone sealer is recommended to prevent water from dripping out.
- Place the essencier directly underneath the open end of the pipe and allow the oil to separate from any contaminants naturally.
Recommendations:
A successful distilling session awaits you. It should be a thrilling and very rewarding experience. In order to ensure your safety and the safety of those around you, keep your tools and components out of the reach of children. You’re going to need fire to heat the still so, in the event you use matches, keep those out of reach as well. After placing the lid on the pressure cooker with the pipe attached to it, you’ll run the pipe through the tub of ice water with the pipe’s open end over the essencier. It is very important that the pipe is at a balanced angle so it doesn’t topple or get knocked over.
Preparation of the Plant Material
When is Just as Important as How
A successful run in distilling essential oils depends greatly on the amount of oil each plant is carrying. This is determined by where the plant is in its life cycle. Every species of plant has a peak harvest time that will produce the maximum quantity of essential oil. This is the part of the process that will require you to do some research so start keeping some notes on plants and harvest times. Here are some tips to get you started:
Step #1: Recognize the Signs
- When harvesting lavender, look for the about one-half of the flowers on the stem to appear withered.
- The best time to harvest rosemary is when the plants are in full bloom.
Step #2: The Secret to Successful Harvesting is Harvesting Correctly
Here is where your patience and persistence will pay off. The correct handling of your plant is just as important as when to harvest them. Assuming you can just throw them in the still and squeeze them out is not going to produce anything worthwhile. Start by learning about the essential oils and their location inside the plants, this will help you in achieving a successful run:
- Many essential oils are stored in the plant’s oil glands, hairs, and veins which are extremely fragile.
- Breaking or disturbing the vessels containing the oil will result in less product.
- Plants used in harvesting essential oils should be handled with focus and care. The less you handle them-the better your results will be.
- It’s possible you may have purchased plants that have been harvested by someone else. Of course, you don’t have any control over the methods used or the harvesting processes. However, you can look at the plants and question the seller regarding their harvest times and whether they look healthy or if they appear damaged.
- Plants that are sold whole rather than powdered or crushed should produce more essential oil.
- Drying your plant before distilling will actually reduce the quantity of oil in the plant BUT, it may increase the amount of essential oil produced per batch. The reason is, you will gain the ability to fit more plant material into the batch.
- When drying your plants, make sure they are away from direct sunlight and are given ample time to dry thoroughly. Some plants, such as peppermint and lavender, can be left to dry in the field for one day after cutting.
- Avoid overheating any plant. Shady and dark environments are best.
- Avoid getting the plants wet once they’ve been dried.
- Begin distilling as soon as possible after drying.
- Drying plants for essential oil harvesting is an optional step, not mandatory.
Processing Your Plants
Distilling Techniques for Homemade or Store-Bought Stills
Essential oil extraction is more popular than ever with websites and products solely dedicated to helping the consumer or retailer carry the best products and make the best choices when it comes to perfecting their craft. Fortunately, with a little help, patience and commitment, you too can reap a beautiful bounty of essential oils. Before getting into the use and application of our fragrant friends, let’s go over the distilling processes available to you:
Step #1: Maceration
Maceration is an extraction process requiring soaking the plant parts in hot water. This releases the fragrances from the plant material. Once the essential oil has been purified, it undergoes another extraction process which separates the oil from the water.
Step #2: Pressing
The method of pressing is where the plant parts are squeezed causing the release of the essential oils.
Step #3: Steam
Considered to be a very easy process to perform, the steam method of distilling essential oils is known for producing better quality and larger quantities of the oils.
Recommendations:
Home distillation is at the top of the list when it comes to the most popular methods of oil extraction as it can be successfully accomplished by amateurs at home. Incorporating the use of steam and insoluble water which allows the separation of essential oils from the water substances. Removing the essential oil properties belonging to botanical materials is a complicated procedure. If you do decide to produce your own essential oils from home, you need to know that this is definitely something you can do.
How to Tell the Difference Between Authentic and Counterfeit Oils
7 Ways to Keep You from Getting Ripped-Off
A sad but true fact is there’s always a risk that the essential oil you’re buying could be a little less than genuine. Even people who are trained in aromatherapy can be fooled into thinking they’ve purchased the real thing by vendors who dilute their products with low quality nut and seed oils or by fraudulently advertising inferior oils as higher quality. There are even a few unscrupulous characters out there that sell synthetic oils that appear real because of the fragrance they’re endowed with. The good news is, there are ways to help you tell the difference. Pay close attention to the following steps so you can be proactive in avoiding the fake essential oil conspiracy:
Step #1: Using Your Sense of Sight: Know What to Look For
The first thing you should know is, essential oils were labeled as an oil because they didn’t mix well with water. This is key information in spotting a fake that’s been diluted with hidden nut, seed or various types of veggie oils.
- To test your oil, place one drop on white printer paper and allow to dry-if it leaves an oily ring on the paper the oil is not pure.
- Note: The exceptions to this test are vetiver, sandalwood, German chamomile and patchouli which have a heavier consistency and much deeper color.
Step #2: If it’s Too Good to Be True
Shady vendors know we love a good sale-especially on a product that is traditionally high-priced. Be cautious when encountering the “big, yearly, everything must go, over 50% off sales” because, to be honest, essential oils (as you’ve probably learned by now) are tons of work, time and knowledge all squeezed into one tiny bottle of aromatic goodness. Just to obtain one bottle of essential oils could require a roomful of plants and if they are rare, it’ll take even more. Oils made from rosemary, lavender and sweet orange are wonderful, abundant sources for essential oils. By the same token, oils made from rose petals, jasmine, lemon balm, helichrysum and different varieties of chamomile will always be, and are expected to remain expensive.
Step #3: What to Look for when Checking the Label
It will take you just a second to learn the Latin name of the plant used in producing the oil you’re searching for. This name should be included on the labeling of your essential oil, if not on the label, at least on the site you’re buying from.
- For example, the Latin name for lavender is Lavare which means “to wash” due to its pleasing aroma and clean smelling properties.
- If you only find a description such as “lavender essential oil” you could be looking at a fake or hybrid.
- If the label doesn’t specifically state essential oil, it simply is not authentic.
- Therapeutic properties are only found in genuine oils extracted from actual plants, not in perfumed mixtures.
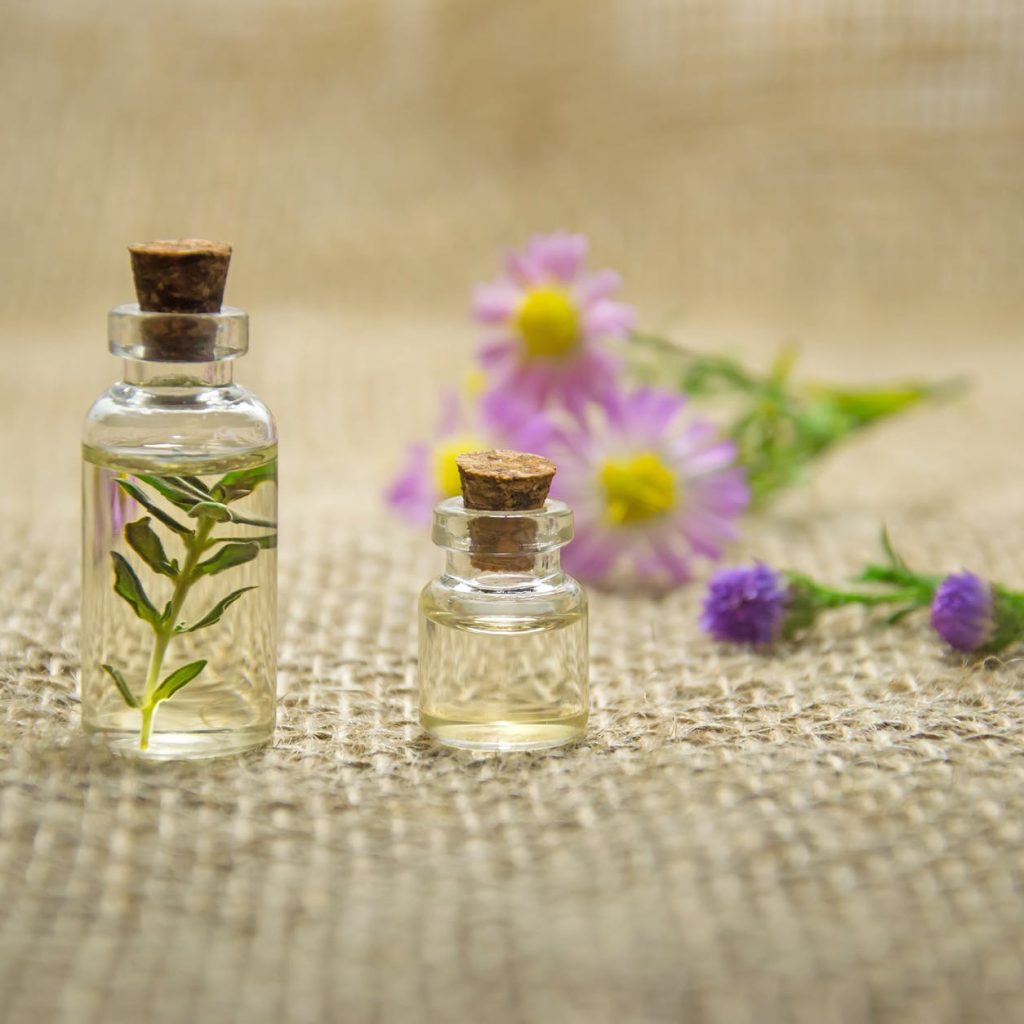
Step #4: Appropriate Packaging and Containers for Storing Essential Oils
If it is truly an essential oil, it must be stored in a glass bottle or container.
- The color of the container should be dark blue or amber to prevent degradation from exposure to ultraviolet radiation.
- Never buy essential oils sold in plastic as the chemical compounds in the oil will destroy it.
- Bottles or containers filled with genuine oils will need to be stored in a cool environment due to their fragile nature and composition.
Step #5: Use Your Sense of Touch and Learn to Feel the Difference
The same way we do a blind taste test, we can learn to identify the feel of a legitimate essential oil.
- Place one drop of your oil on the pad of your index finger and a drop of veggie, seed or nut oil on the other.
- You’ll note any differences or similarities once you’ve rubbed them with the help of your thumb. Genuine essential oils may slip slightly, but they should not feel greasy or thick in any way.
- Heavier oils like patchouli, sandalwood, German chamomile and vetiver are exceptions
Step #6: Added Extras for Waste Prevention and Accurate Dosages
Most bottles of essential oils will be sealed with a type of plug called an orifice reducer which controls the flow of the drops. It’s a great tool for adding dosages but it also prolongs the shelf life of the oil by preventing oxidation caused by exposure to the air.
What you want to avoid are bottles equipped with plastic dropper type pipettes for dosage control. Plastic or rubber both are materials that can break down in the oil contaminating it.
Step #7: The Reasoning Behind Organic Oils
Genuine essential oils will come from real plants and, real plants are often exposed to pesticides, however, there is another term we’re going to get familiar with:
- “Wild-crafted” noted on a label is also safe. It tells the consumer that the plant has been harvested in its natural environment rather than farmed which usually means they have not been sprayed with pesticides.
- When a product is labeled organic, it also tells us that this particular product is going to cost more. This is where you have to decide which products are worth the extra bucks and which ones aren’t.
Note: Some essential oils made from citrus fruits have been tested and have shown positive for pesticides. If you can get a guarantee this would be the product to get it for.
Recommendations:
When shopping for essential oils, always check and compare prices online. Customer reviews will also give you insight as to the reputation and honesty of the merchant. There are never any guarantees as to whether or not a product is truly organic, but if you follow the guidelines we’ve outlined above; you’ll be a step ahead of the fakers and novices. When you’re an experienced producer or buyer of authentic essential oils you’ll automatically start to get a feel for good results vs bad ones and it’s times like these that will make the difference in the reviews you write (or receive). The quality of the product should always matter to you and/or your supplier.
Essential oils are sought after because people are using them to improve their quality of life, relieve pain or alter the progression of certain health threats. Take the responsibility to produce a good and reputable product if you’re into the home distilling and start expecting others to act the same way. Essential oils really help people -let’s make sure everybody has the opportunity to benefit from their investments.
Sources
- http://naha.org/explore-aromatherapy/about-aromatherapy/how-are-essential-oils-extracted/#expression By Jade Shutes, New York Institute of Aromatic Studies
- https://en.wikipedia.org/wiki/Still
- https://www.amazon.com/essential-oil-still-distillation-kit/s?ie=UTF8&page=1&rh=i%3Aaps%2Ck%3Aessential%20oil%20still%20distillation%20kit
- https://www.wikihow.com/Make-Essential-Oils
- http://www.aromatherapy-at-home.com/essentialoilsforfeet.html
Essential Oils for the Feet - https://remedygrove.com/traditional/essential-oil-making-home-distillation
Essential Oil Making: Home Distillation Updated on November 15, 2017 TheresaAnn - https://www.prevention.com/beauty/natural-beauty/7-signs-your-essential-oils-are-fake Jessica Chia 2014-04-28 blog
- https://aromafloria.com/mixology-organic-lavender-essential-oil-blend.htm